

Assembly instructions
Flanges
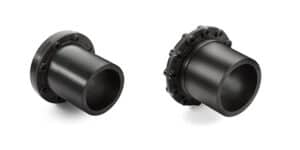
Correct assembly of the correctly matched components is essential for the safe and reliable functioning of the flange connection.
Introduction (expand)
The following assembly instructions are based on DVS specifications for the assembly of flange connections. Determine the materials used for the components of the “flange connection” system
the required screw tightening torques. The screw tightening torques are required for the forces and the resulting necessary surface pressure. In addition to the flanges, the components in this system are the gasket as well as the bolts, nuts and washers. The flange partners can be made of different materials (PE100 and cast iron or steel, for example). The special properties of all components involved are therefore taken into account when calculating the screw tightening torques under ideal conditions. The values listed then only apply to this constellation. Ideal conditions include stress-free installation of the listed components at room temperature and loading of the flange connection only by the assumed load case (usually internal pressure). Additional loads that affect the connection and thus the surface pressure of the gasket must also be taken into account. In particular, temperature differences during installation, assembly and operation, which have a particularly strong effect on plastic pipes, as well as slopes without fixed points, must be taken into account by the planner as special installation and operating conditions. We will be happy to assist you with any uncertainties and special installation conditions. Our assembly instructions and the screw tightening torques determined for the respective flange type can be used to create a permanently tight flange connection for our flange solutions.
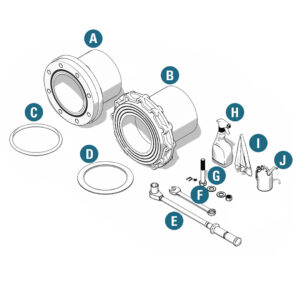
Material required
A: Special flange VP
B: HP flange
C: O‑ring seal
D: Profile seal
E: Torque wrench
F: Open-end wrench
G: Bolts, nut and 2x washer
H: Cleaning spray
I: Cleaning cloth
J: Lubricating oil
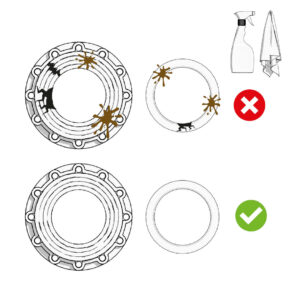
Step 01
Cleaning and checking the collar and seal
Step 02
Lubricate all threads. Insert the seal and check that the O‑ring is seated correctly.

Step 03
Alignment of the collars and seal

Step 04
Tightening the screws by hand
To note:
Exceeding the screw tightening torques leads to damage to the elastomer seal or the PE collar and to leakage.
After the pressure test, the required screw tightening torques must be checked and, if necessary, retightened using a torque wrench and the required screw tightening torque.


